Connection Configuration
Configure your Connection in the Preczn Dashboard.
Adding Connections
In order a connection to be available to your merchants, you will first need to add the connection to your platform.
Depending on the type of connection you are establishing for your platform, you may need to share platform API keys, credentials, and/or secrets. We'll cover how to add a platform level connection in the following steps:
Select 'Connections' from the left-hand navigation menu:
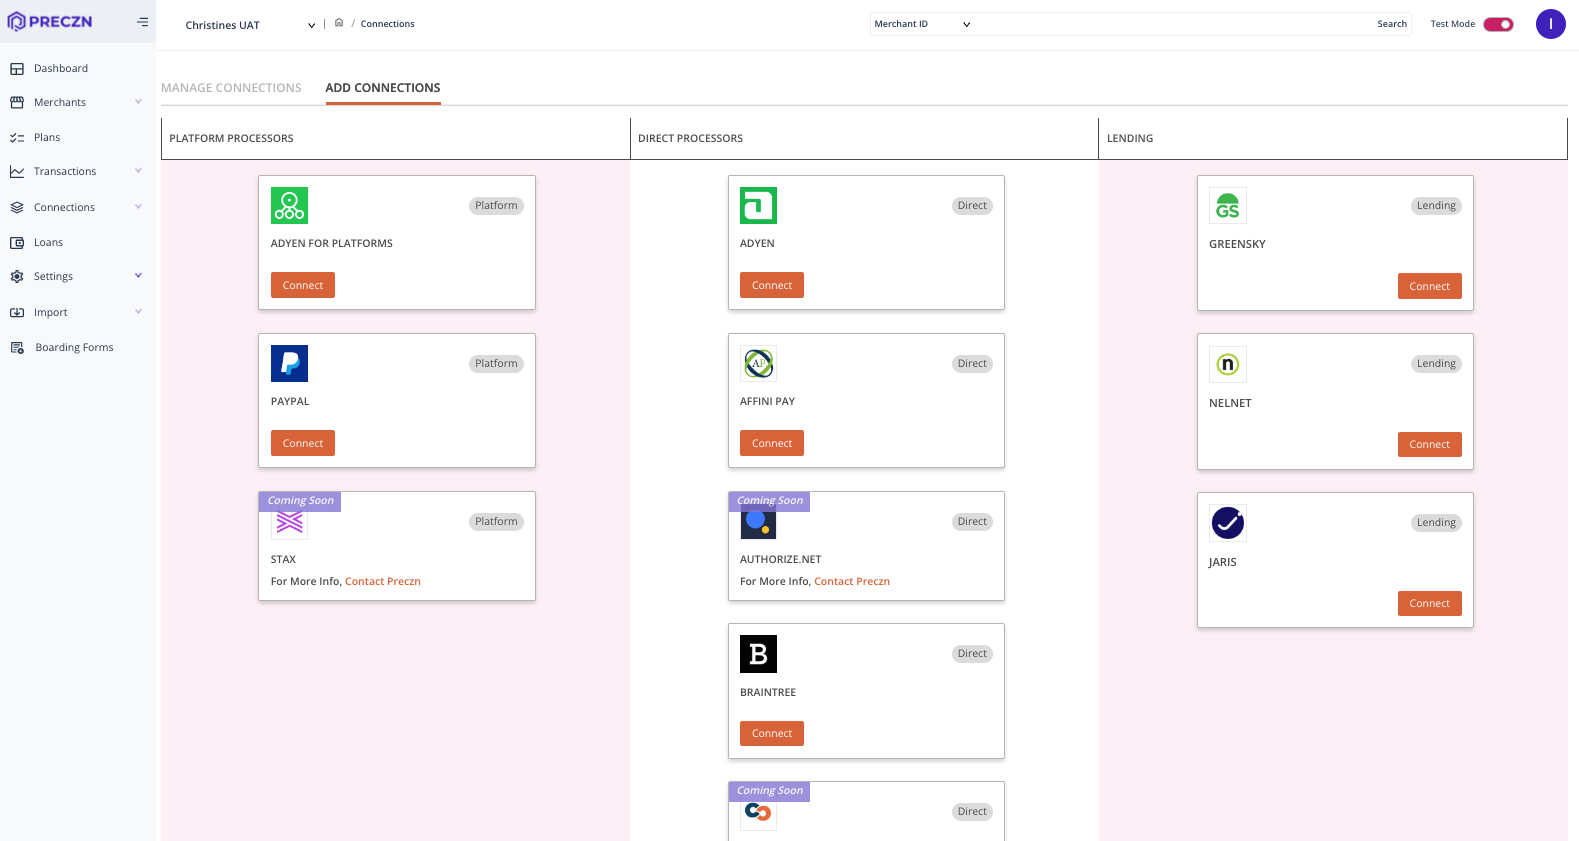
This section allows you to add credentials to the payment facilitation provider of your choice.
- To get started, browse the Connections page to ADD CONNECTIONS tab
- Select 'Connect' under the relevant Connection
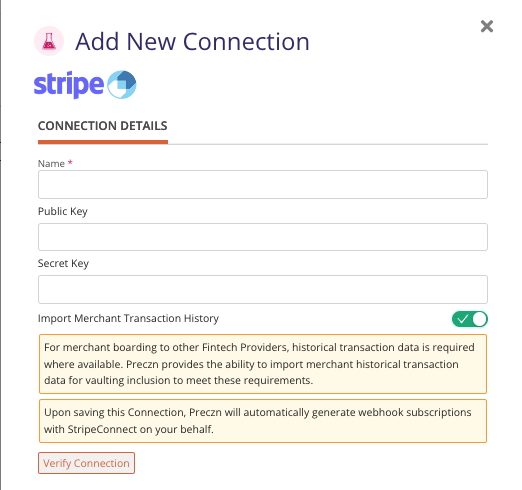
From here, you'll be presented with 'Add New Connection' drawer.
- Enter a name for your Connection. This can be a descriptive name of your choosing.
- Enter relevant credentials (Some processors utilize credentials unique to each Merchant, while others provide credentials for your software platform's integration)
- PreferredFor available connections, toggling "Import Merchant Transaction History" to on will allow available transaction data to be presented upon completion of Creating Merchants with Bulk Import via Connection API
- For some connections- additional configurations will be available. You can view Connection specific options on your PSPs respective connection page.
- Select 'Add Connection' or 'Verify Connection' - which vary between Connections
Processor CredentialsWhile most processor Connections require credentials at this stage, not all do.
Processors such as Stripe and Braintree request direct credentials at the Merchant level.
Repeat this process for any other Connections your platform supports.
You can also add Connections in Test Mode for your testing purposes.
Depending on whether your Connection is created in Live or Test Mode, Preczn will automatically route to the appropriate sandbox or production endpoint at each processor.
Adding Connections to Existing Merchants
In some cases you will need to assign Connections to Merchants already loaded to your Portfolio.
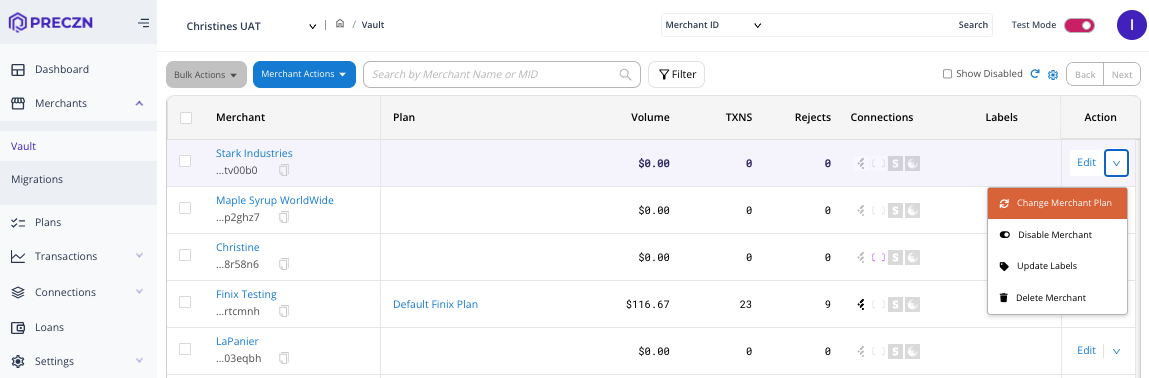
- Navigate to 'Merchants' in the left-side navigation pane, and open your Merchant Vault.
- Select the Merchant you wish to edit under the Merchant Name column to view the Merchant's vault detail
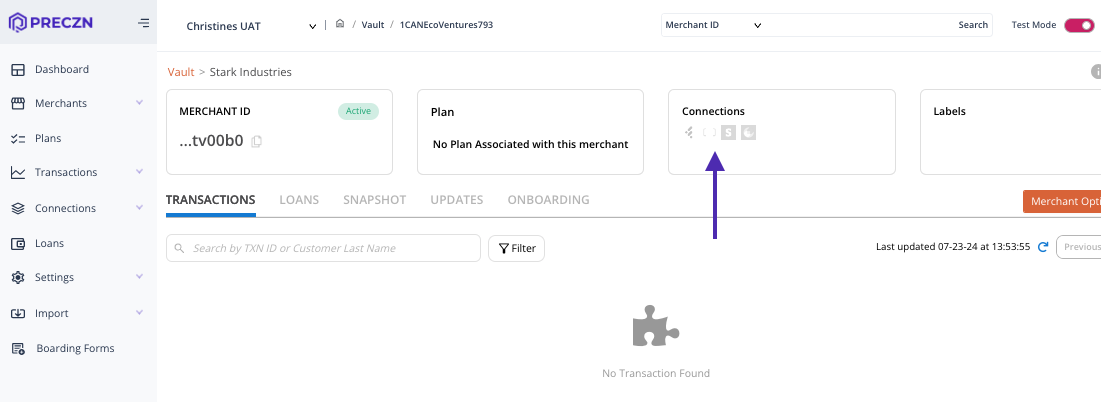
In the Merchant's Connections pane, you will see your available Connections.
- Select the relevant Connection(s) and add credentials.
- Then Save Connection, and Update Merchant.
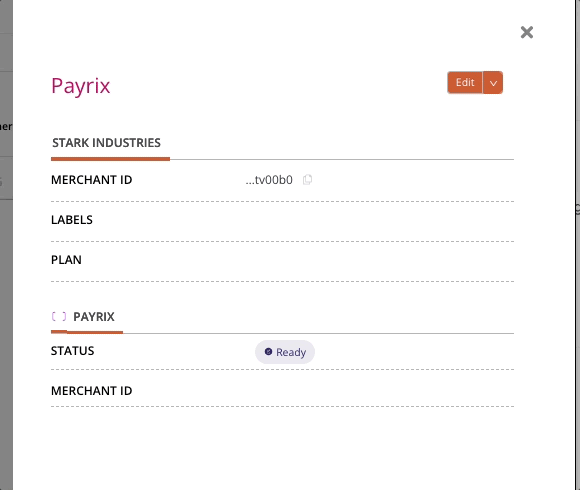
Each Merchant's assigned Connections are displayed as icons under the Merchant Portfolio 'Connections' column:
- "greyed out" Connection icons indicate the Merchant does not yet have credentials for a given connection
- Full color icons indicate the Merchant has validated credentials saved for a given Connection
Removing Connections
To remove Connections from a Merchant, it is necessary to first remove or change any Plans for that Merchant which implement the Connection(s) to be deleted. It is not possible to remove a specific Connection if the Merchant is currently assigned to a Plan which uses that Connection.
For information on creating and editing Plans, please see the Plans & Rules page.
In the following example, a Merchant contacts your platform, and informs you they wish to disconnect from Stripe, but will retain their Braintree Connection:
- First, navigate to your Merchant Portfolio, and select 'Change Merchant Plan' to the far right of their name:
This will open the Change Merchant Plan drawer.
- Next, select the Plan you wish to assign to the Merchant. Each available Destination Plan in the dropdown displays the icons of each Connection included in that Plan to the right of the Plan name.
- In this example, a plan using only a Braintree Connection is selected:
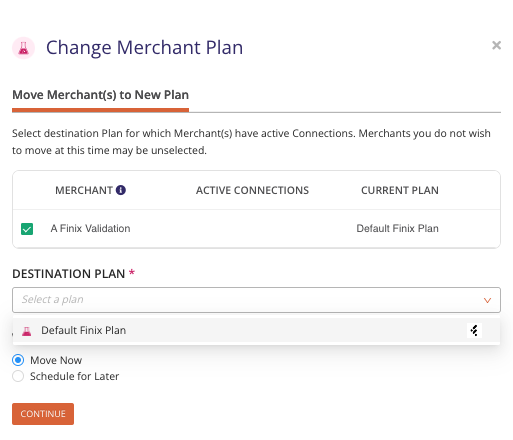
- Select when the move will happen - now, or at a scheduled future time - and 'Continue'
- Confirm the change in the modal
Updated 10 months ago