Plans Overview
Preczn Plans allow you to individualize exactly how your processor or payment facilitation provider Connections are leveraged. In order to create tailored Plans that best meet your Platform's needs, you will first customize robust Rules to handle various transaction scenarios.
Default Routing RuleWhen creating a new Plan, Preczn applies a Transaction Distribution Rule by default.
This default Rule splits transactions equally between your selected processors by currency volume.
(I.e. In a default Transaction Distribution scenario with 50 transactions totaling $500 dollars, Preczn routes the transactions to achieve approximately $250 per processor.)
This Transaction Distribution Rule ensures a Plan will be ready to process when set to Active, helping to prevent declines.
Creating Plans
Because Preczn allows you to have multiple Plans for your portfolio, you can custom tailor Plans and Rules to the unique needs of your Merchants.
- Browse to the 'Plans' page in the left-hand navigation menu.
This page allows you to add new Plans, and manage existing Plans for your platform.
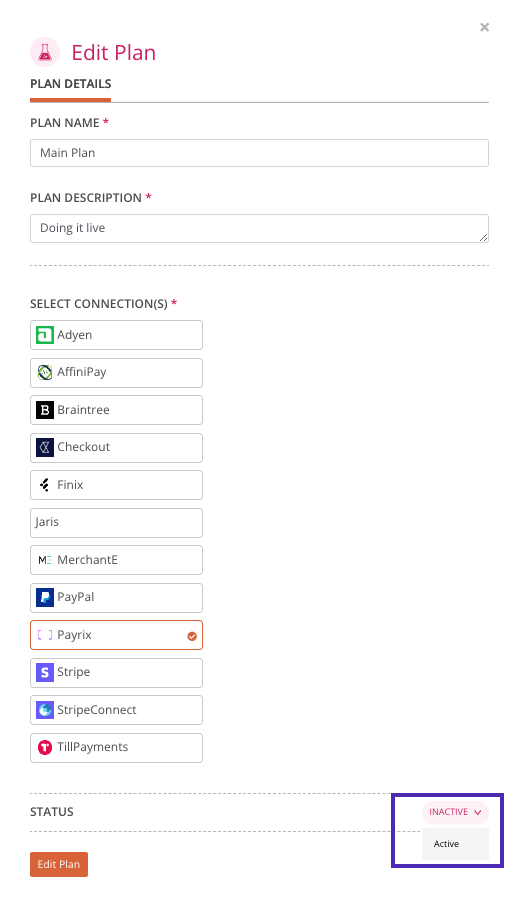
- To get started, select '+Add Plan' in the upper right of the page.
- Enter a name and Description for your Plan. These can be any descriptive label of your choosing.
- Next, select from the list of available Connections to add one or more to your Plan.
- Click the 'Add Plan' button to save your new Plan.
- Your screen will automatically open to your new Plan's details page. Here you have the option to edit the Plan, and add more Routing Rules. You will see the default Distribution Rule in place within your Plan.
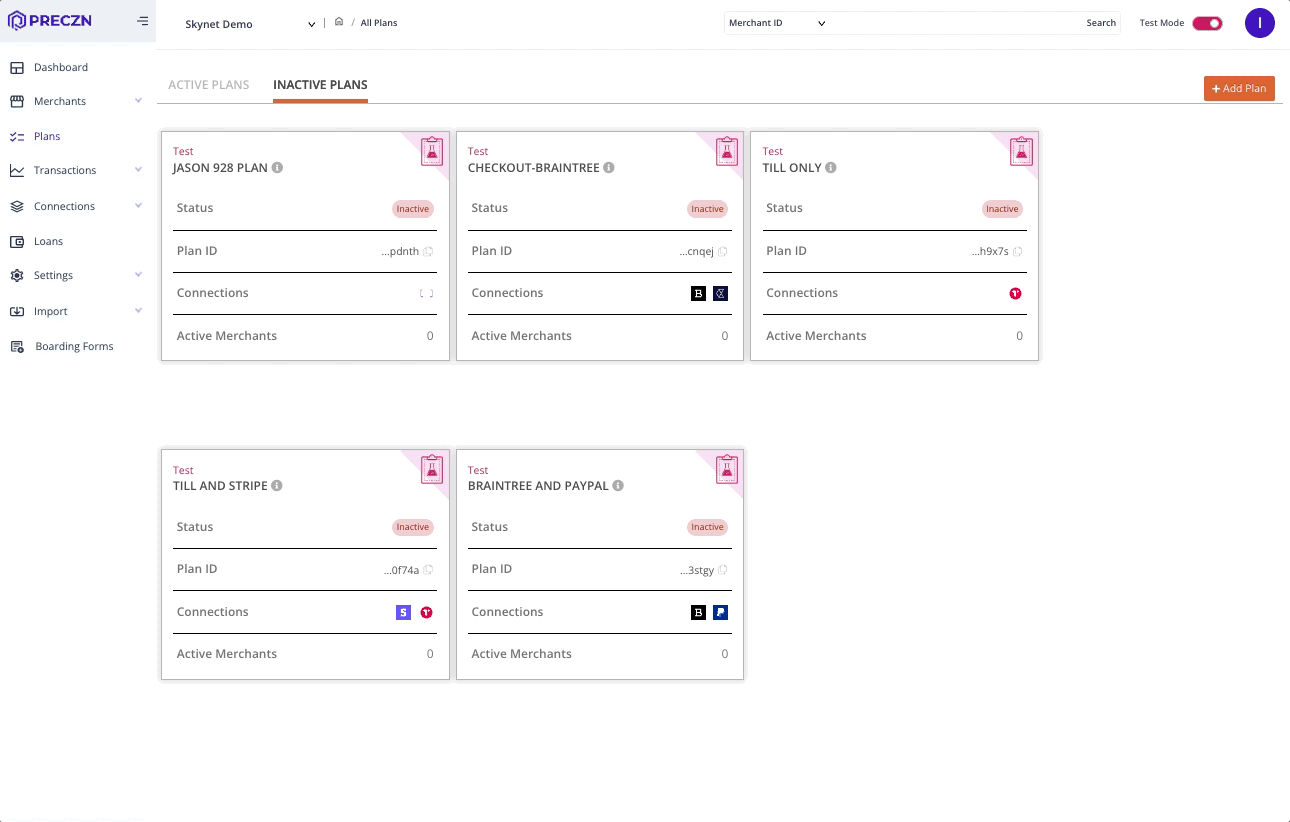
Your new Plan will now be under the All Plans 'Inactive Plans' tab. In the next section, you will learn to enable your Plan.
Mode: Live vs. TestToggling between modes in the left navigation pane determines the mode for your Plan.
Only Connections configured in the same Mode will be available. Live and Test environments are completely separate from one another, including Merchants, Plans & Rules.
Please check Live Vs Test Mode for more information.
Enabling Plans
After you've configured your Plan with desired Rules, you will need to Enable the Plan.
- From the All Plans page, select the 'Inactive Plans' tab. Under this tab you will find the Plans you have created, but not yet enabled.
- Select the Plan you wish to enable.
- On the Plan Details page, select the dropdown next to 'Edit' in the top right.
- Select 'Enable', and again on the modal to confirm your action.
- Your Plan is now Enabled and present under the 'Active Plans' tab
Updated 5 months ago